
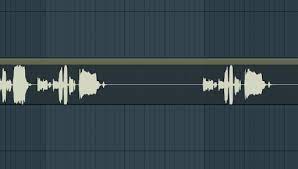
Remove any silences from your vocal.
Your vocal track will always have breaks. It doesn’t matter if it’s a brief break (e.g. When the singer takes a deep breath during the instrumental bars. These parts should be cut, especially for longer periods of silence. Why? It eliminates all unnecessary noise.
The microphone or your recording environment could cause this unwanted sound. If you are recording in a DIY bedroom studio or from your clothing, the mic may pick up noises like your feet tapping the floor. They are there, even if they don’t sound like anything.
It’s not so difficult if you record one take. If you have many stems to record, the noises can overlay on your project, and you will be able to hear them. These noises are not what you want, so remove them. You can do this by making a fade in/fade out.
You can cut out the silence and fade the first part. Then fade the second one.
Sometimes, recordings may even be affected by electrical noise. The quality of the microphone or preamp you use to create this noise can impact the sound quality. This noise will be heard in quiet areas and throughout your entire recording.
To remove it, you can use a denoise plugin. Nearly all DAWs offer a free plugin. Fruity Loops offers “Edison”, for example.
Volume automation
A vocalist will naturally sing parts at different intensities. It’s possible to adjust the volume manually or automatically.
This is usually necessary for sibilances such as “P” or “S”, but it can also be useful on any vocal section that you feel sounds better when spoken loudly or quiet.
Depending on what sound you want, you can manually adjust the volume by using automation.
This will impact how plugins react and function. A compressor, for example, will work harder if the volume is very different between loud and quiet parts. Adjusting your volume levels now will affect the perception of your listener and influence what your plugins do later in the mix chain.
Auto-Tune (optional)
Autotune is a creative tool that some artists use. Some people use autotune because they are unable to sing. Autotune is not a necessary element of your vocal mixing chain. You can use it however you wish.
Antares Autotune Pro is a good plugin for autotune. Auburn Sounds offers a Graillon 2 edition for free.
Subtractive EQ
We now come to EQing. To be more precise, subtractive EQing focuses on lowering frequencies and not adding them.
This step can be used to cut out unwanted low frequencies below 120Hz. You can also lower some upper mid frequencies (between 250-400Hz) or sweep your filter with a high Q to locate the irritating frequencies and turn them down.
Make a bell filter with a high Q and a large boost (like +10db). Swipe around the frequency spectrum, and if you hear an irritating frequency, change the +10db boost to -3/-4db.
De-session
De-session’s purpose is explained in the word itself. It should remove harsh and hard “S ‘” sibilancies.
Most plugins will require you to define a frequency range to allow the plugin to know where the “S” frequencies are. Most plugins will use a frequency range between 7kHz to 14kHz. You must also set a threshold to let the plugin know when it should lower the volume.
It all depends on the vocal quality, and you will need to determine a value for your audio material.
Fabfilter Pro DS is a good de-esser. However, if you are looking for freeware, Lisp from Sleepy-Time DSP is a good choice.